15
Mar
Despite their appearance, the difference between a shower cabin and a bathtub is the time frame that stands between them; a bathtub is so middle ages, being the old times symbol of richness, while a shower cabin is the main element of modern, 21st century bathrooms. So if you still have an old bathtub in your bathroom, it’s time to think about changing it.
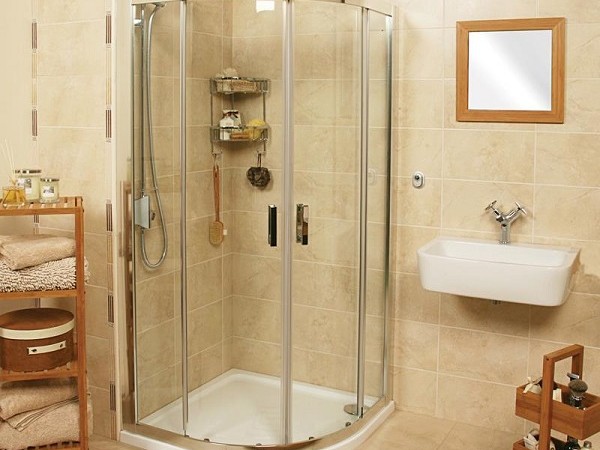
Choosing cubicle showers can be one extensive procedure; measuring the available space, the doors and their mechanism of closing, and choosing the right base; are you going to go with a quadrant, an offset quad or a corner entry? Once you choose the right fit for your bathroom, the next step is installing it. And here’s where you will probably opt for calling a professional to do it and end up paying a lot of money for something you can easily do yourself. Here’s what you should do.
Once you decide you’re going to install a new shower cabin in your bathroom, the first thing you need to do is prepare the walls. This means every piece of drywall or plaster needs to be completely removed. You can use various tools to do this fast and easy, but make sure they’re the best ones. The next thing is to install new framing studs and shims. Some framing studs will probably need to be removed, so you’d want to do that as well in order to put new ones and create a level and straight wall.
Cubicle showers mainly come with a one-piece base made of the floor and walls which are perfectly connected in one solid piece. Once you choose the corner where you plan on installing it, use a level to measure the horizontal levelness and the vertical plumb. If it’s not levelled, use wooden shims to lift the base as needed to level it up.
This is the part to which you should pay the utmost attention; the drain hole should be completely in line with the shower, because otherwise you can easily cause a flood. The best way to determine the place for the drain hole is to place the base of the shower, mark the place where the hole should be, remove the base and drill the hole. Your shower base may need a drain strainer, which is the element that makes the connection between the shower base and the drain pipe, and as such should be installed before the base is completely sealed on the floor.
This is the phase where all parts you took off should go back in their place. Here you should place the base in a perfect alignment with the drain hole. Once the drill finds its perfect spot, use screws and a power drill to secure its position.
Installing the shower is the last phase of the process. This will protect the walls from moisture and mildew. Use latex caulk (just a small bead of it) between the adjoining shower walls and the base to connect them. While doing that, pay attention not to put chalk over the drain holes at the bottom of your walls. You may want to consult the manufacturer of the shower for the type of chalk and the right chalking procedure you should do.